Friday 27 February 2015

Mr Fox pays us an unwelcome visit

Today I had a lovely day today out for a playdate and lunch and with some friends and their kids. That was until I got home, opened the gate and saw the telltale mark of Mr Fox, feathers everywhere.

We've not had a good time of it with the chooks recently, just 6 months ago we had 11 and now I'm down to 4. One got ran down in the lane, one was egg bound, one ex-bat was poorly and disappeared, one ex-bat was so ill I asked our neighbour to finish her off as it was a Sunday and I couldn't go to the vets. I'm quite soft really, I've never seen anyone kill poultry and I just don't think that the first time we try it should be without instruction, it's just not fair to the bird.

A few red hens just disappeared and unfortunately when I found the trail of Molly's feathers today I could see where she'd been dragged through the fence behind the compost and there were piles of red feathers that I hadn't found last time one went missing.

Molly was a white Sussex and I've found them to have great personalities. She was the loudest clucker and I was always telling her to quiet down when I was giving the girls their daily corn feed.

I've always been a believer in letting them free range as much as possible, I want their lives to be as good as can be, but I've got to temper that with actually letting them have a decent amount of time too. We have an electric fence enclosure to keep them safe at night but I think I'll have to buy another length of fence and make a larger enclosure for them to live in during the day too.

I don't feel too resentful towards the fox, I know they are only doing what comes naturally to them, but once they know where to get the easy pickings they'll be back. The same fox finished all of our next door neighbours flock off so it was only a matter of time. If I find someone who'll shoot him I'm afraid I'll take them up on the offer to protect my girls. I understand that is contentious to some people but when you're attached to your flock you want to protect them from being picked off.

Anyway, it's a sad end to the day when you're clearing the lawn of feathers but I know Molly and all her other departed flock members have had an excellent life with us and it means a lot to me.


As you can see they get up to all sorts of mischief. Once I've got them secured I'll go off to Newland poultry and get some more girls to join the flock. The chickens are always in excellent condition and they're really helpful if you need advice, not to mention they have everything you could need in their shop. I also feel that where possible we should try and buy locally, it's good for the local economy and the environment. 

I've had ex-battery before and I will again, but they die so soon, their lives are just so wretched that it seems to take all their reserves and any little thing finishes them. That's the main reason for never buying caged hens eggs, before we had the girls I always bought organic free range as they have the largest minimum space per bird allowed. If you saw how caged birds were kept it would take the most hardened person to buy their eggs. 

So, world put to rights, goodbye Molly, we'll miss you.

Thursday 26 February 2015

Muntjac sighting

The weather was a bit miserable yesterday and I was getting ready to collect the wee man from pre-school when I looked out of our bedroom window and saw a Muntjac deer in the wilderness next door to us. We've seen them a few times in the garden, usually singly but last time we saw a buck, doe and kid together. I also saw some birds of prey gliding over the garden and a couple of pheasants too over the course of a few minutes.


A few of the bulbs are coming up too so spring is in the air. 


Monday 23 February 2015

Weekend update

We've got a few things finished off this weekend. I got the last pane for the greenhouse from Amazon, so it was fitted and it's all ready for my veg. We also managed to fill the last two vegetable beds with soil, all ready to go and covered them with some cardboard left over from the greenhouse just to keep the weeds down.

The next step is to dig over the area that we are going to plant our potatoes in. It's just next to the greenhouse but is currently turfed (with a strong contingent of weeds). James has had a look at hiring a rotovator to help us turn the area over but it's about £60-70 a day, that's just mental! We may be back in the garden digging it all over by hand :-(

Also last week I had a meeting with a firm to draw up some more plans for getting an extension on the house. The guy asked some really interesting questions which gives me faith hat he knows what he's doing. I look forward to getting some initial drawings and am so excited to be starting afresh.

Friday 20 February 2015

How we battened, insulated and plastered baby girl's room

James has written a post about how we did baby girls room, it’s not a detailed how to but gives you an idea of how we renovated her room.


The room in a complete state when we moved in,
complete with toilet!
You can see the peeling wallpaper on the rear wall.


The first thing we did in her room was to remove all the wallpaper. This proved to be the easiest part of the process as it all came off in long strips. The stripper was plugged in but was never actually used.  We could then see the damage to the walls. The plaster on one of the interior walls was completely blown, at some point the roof had leaked and the previous house-proud occupants had obviously not fixed it soon enough hence the blown plaster. We only had to touch this wall and some of the plaster was on the floor (I think looking at it had the same effect!).  It was a no brainer at that point, all the plaster had to come off.  This was easy as the plaster was in such a state it peeled off with a claw hammer. The loose parts of the ceiling were pulled down. We also removed the airing cupboard that was taking up a large section of the room and the odd toilet and sink in the corner of the bedroom.

Old plaster with lath wall revealed
Airing cupboard before removal

One of the internal walls is made of huge oak beams with lath and plaster covering them. We pulled the crumbling plaster off and took the lath down so we could fill the spaces between the beams with insulation. The lath was saved and used as kindling over the next few months (200 year old wood burns amazingly!). Apart from the mess this was quite a straight forward job. 

Walls complete with original lath

Internal wall after lath was removed, with original oak beams

The external wall and one of the internal walls is made of stone so we took this opportunity to point up the stone walls. Although they were not going to be seen I used this as a good practise wall as in a few months I was going to start the laborious job of pointing the outside of the house. As the walls would be subsequently insulated and plastered it was a great place to have a practice for the walls outside that would be seen.

Internal stone wall before pointing

We planned to batten all the walls, insulate between the battens and then plasterboard and finally skim the walls. Once the walls were pointed the central heating pipes needed to be moved closer to the walls so the pipes would not interfere with the battens and plasterboard. Sounds easy on paper but just these jobs took an age with a little man running about the place.
We then had the dilemma of whether to overboard the ceiling or kick it down and put a new one up in its place. This took a lot of searching the internet for advice, which didn’t really provide a definitive answer as there are a lot of theories and pros and cons.  There does not appear to a right or wrong answer on this. After speaking to a mate of mine who is a builder we decided to overboard the ceiling. He told me if the ceiling is in a reasonable state and secure, there is no benefit of kicking the ceiling down only a whole load of mess. 
We overboarded (stuck plasterboard on top of the current ceiling) the ceiling with 12mm thick plasterboard using 75mm plaster board screws screwed in approx 150mm apart. We used this length screw as it needs to go through 12mm plasterboard, the old ceiling and grip by approximately 40mm in to the wooden beam above.  Before we lifted a board up to the ceiling I jumped in to the loft and drilled either side of each joist so as the centre of the beam could be marked to aid in screwing the boards in place. This way attaching the board to the ceiling should be quicker and easier. The other important thing to remember is to have the joints between the boards touch on a joist for maximum stability. Once all the boards were screwed up (with the screw heads slightly recessed under the board surface) it was time to tackle the walls. The ceiling was completed first as we planned to batten and board the walls and the ceiling could be supported by the battens. One tip, to pick up the position of the light pendant is to screw a long screw in to the joist where the cable comes through and as you push the new board up to the ceiling a hole will be made exactly were the cable is.
The walls were tackled in two ways. The first was the wall that was originally a lath and plaster wall. As we had removed the original lath and plaster all that was left was the original wall beams. We could tell they were not modern timbers as some of them still had bark on the logs. As they were exposed we gave all the wood a good few coatings of wood worm treatment for peace of mind. As the beams were all open we filled the voids with polystyrene insulation ready to be boarded with 12mm plasterboard. We boarded right up to the ceiling to help take the weight of the ceiling boards.  
For the plasterboard on the wall we used 25mm length screws screwed through the plasterboard into the original wooden beams every 150mm. We used the polystyrene for the insulation in this wall as it is an internal wall so the thermal efficiency was not as important to us as in the external wall. The polystyrene also gives very good noise reduction between rooms. If Kingspan is used it can sound hollow and not reduce the noise as well. 

Polystyrene insulation in internal walls.

We had two more walls to complete, one an internal wall and the other an external wall. Both of these walls needed to have a frame built to house the insulation as they were stone walls. We built a frame out of stud timber to fit the profile of the wall. The timber we used was approx. 3” by 2” as this allowed some clearance as the plasterboard screwed to it needed to pass over over the central heating pipes. 
Once these were built the upright battens could then screwed in place, these were spaced 400mm apart (measured from the centre of the first upright to the centre of the next). I believe 400mm is the standard as plasterboard sheets are usually 1200 or 1600mm wide, allowing for a few rows of screws to keep the plasterboard in place. This then gives the best stability for the plasterboard and more importantly you know where to put your screws in. Once all the battens were in we lifted the frame up to the wall and screwed it to the wall. We used screws that would give 50mm purchase into the wall and brown rawplugs.  Screws were spaced every 150mm.  As the walls are stone and pretty uneven when you put up a flat frame gaps appear between the two. Any gaps that appeared between the wall and the frame were filled with offcuts and hardboard for rigidity.

External wall with frame built. Here you can see offcuts made
to brace the frame against the stone wall.

Overboarded ceiling with timber frame screwed to wall 

Uprights with 400mm spacing and after rough pointing


Framing round window with central heating pipes that we had
to make sure frame was proud of. We did some uprights to the
floor once fitted for stability and to screw skirting to.

Once on the wall, the frame on the internal wall were filled with polystyrene and the external with kingspan. I somehow omitted to take any pictures with the insulation in the frame :-( The 12mm plaster boards were then screwed on to the frame with 25mm length plasterboard screws. The external corners around the window sill were covered in beading to give a clean edge when plastered.
We then had two options when finishing the boards. The cheapest would be to fill the gaps between boards with filler and tape all the joints with paper tape. The joints are then sanded down and you can paint straight on top of the plasterboard. 
The second option was to tape the joints with scrim (a plasterboard tape) and then plaster over the boards. We decided to plaster the room as it would give a better finish. The joints were taped with scrim and any larger gaps were filled with expanding foam. My life long best friend then helped me plaster the room. We two coated the plaster to give it a good finish. As the name suggests we put a second coat of plaster over the first as it was  still drying to give the best finish. We were careful not to polish it too much as nothing will stick to it if the plaster is over polished.


The room then needed to be painted and the skirting fitted (another mammoth job).

Job done. James.


Painting and adding a windowsill.

Sunday 15 February 2015

Greenhouse is up!

Today we got the greenhouse constructed on the concrete pad by our veg beds. All the work we did in the evenings really helped as we managed to put up most of it with the baby having a nap in her cot. It is super light so we screwed it into the pad but it looks good. My only complaint? They left out a bloody glazing panel. How irritating, now I have to enter into lots of back and forth with Amazon to try and get another one. If they want it returned they can take it all made up because I'm not taking it down!! I'm more annoyed than I should be, but I think the last five things I've bought online have had a fault and needed returning so this is about the last straw.

As we were busy building, the little man kept calling me a veggie. When I asked what veggie I was he said pepper and asked me if I was growing bigger and bigger, he's so sweet, he's really excited to get the veg growing.

We also planted our apple trees as cordons using instructions from Kev here at an English homestead. I'm hoping to use them as screening between us and the very overgrown field next door and will need a few more trees over the next few years to fill it out a bit.

We also spent some time shifting more soil into our veg beds so we now have two full beds ready for this years crop. The area we're moving it from will then be level with the rest of the ground and is where I plan to plant the spuds this year.

I'll take some photos next time I'm out back but James took one of the wee man in the greenhouse (his greenhouse so he tells me)


Friday 13 February 2015

Seed sort out, chitting and greenhouse prep

This week I've had a sort out of my seeds and made a chart to organise what needs planting and when. I'm really excited to get some things in the ground, or at least get them started in the greenhouse. Which leads me to what else we've been up to; putting our greenhouse up. 

We had an old rotten greenhouse that was in pieces ready for construction in the garden but a thorough look persuaded us it really wasn't up to the job. I've got some small plastic greenhouses but I'm planning on using these for acclimatising my seedlings. I bought a metal greenhouse that was within our budget which I'm hoping will last for a few years until we can get something more permanent. We've been constructing the bits we can inside to save us spending hours in the cold this weekend with the kids. Hopefully by the end of Sunday I'll have some pictures to show you of our beautiful greenhouse all built and excited to grow it's seed babies.

This years growing will probably be a bit of a challenge. On a positive point we have a much sunnier spot for our veg beds at this house but we're also much more exposed on a hill so we tend to have frost on the ground much longer. I had an idea of what would and wouldn't grow in our last garden but now it's all new. I've decided to just have a go at growing some of my favourite veg and see what works.

I've also set my potatoes to chitting so my windowsills are full of spuds growing their roots ready for planting.


So this weekend it's getting the greenhouse built and I've also got some apple trees to plant in their final home from a friend Kev at An English Homestead, a Pitmaston pineapple and Blenham orange, looking forward to seeing the fruit this autumn.

Plus James is off collecting some wood from our lovely neighbour Jane who's had her woods managed and is letting us take a few trailer loads for seasoning in exchange for some of James' time at some future point. Is there anything better than free wood? (Ok so I'm sure most people would say yes but in our house we LOVE free wood!!)

Sunday 8 February 2015

Kitchen reveal and on a tidying mission...

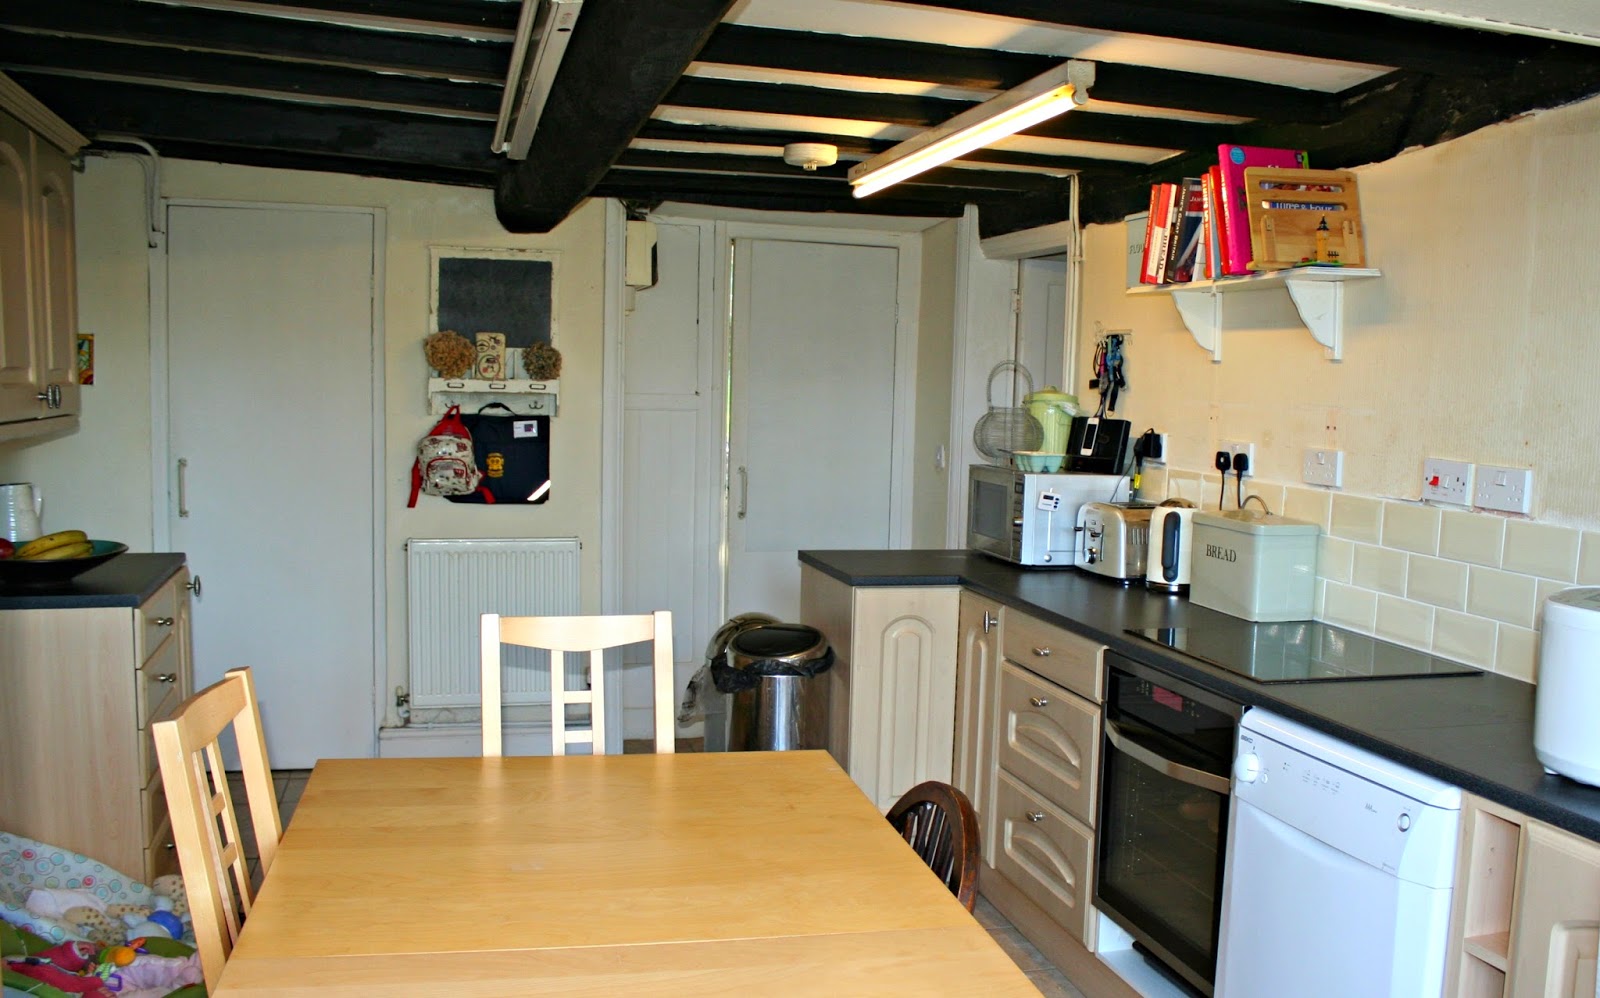
This week we've had a bit of a change of pace. We finished our kitchen last week and I've got few pictures here to show you. It is such a fantastic change and although done with a second hand kitchen it really looks great. We added a new worktop and some tiles and it makes the whole thing look made for us. I have more storage so now everything has it's place and it looks tidy.


Compare this to what we started with and I think it looks a million times better. The only other thing we want to do is to re-paper the walls above the tiles as it really lets the kitchen down. You know how it is, you make one thing look nice and it leads to other jobs. We never planned to go to mad as we plan one day to get a kitchen we want but we want it to look clean and tidy.


We had a pile of paperwork on the kitchen table for months and so the next logical step to finish the kitchen was to finally sort this pile. While I was at it I thought I better also sort the three or four (or six or seven) other piles that I had stashed in the dining room. To be honest there was so much junk in there we couldn't use it at all. 

Ever since we moved there has been stuff that hasn't had a home and it's time to sort it all out before the weather improves and we get on with outside jobs. So this weeks challenge has been to sort it all out. James and I spent the evenings sorting paperwork, keeping what was necessary and chucking the rest. We also found new homes for other stuff and made a bag for stuff for the charity shop.

Last weekend we also went to IKEA and got some storage for the kids toys. We had a massive chest and our son couldn't find anything he wanted to play with. We got some cupboards and drawers and now he can find whatever he likes and our front room looks less like toys'r'us. So basically this week has been sort, sort, sort!

Tuesday 3 February 2015

Donating breastmilk - Every drop counts!


Today I had my final collection of breastmilk from Birmingham Women's Hospital. It's the end of my time as a breastmilk donor as baby girl is almost 6 months old and the milk bank can only accept milk from donors while their babies are under 6 months. This is because the composition of breastmilk changes naturally as a baby grows and it's less suitable for a premature or newborn baby. Isn't nature amazing?


I've been pumping one bottle a day since baby girl was about 2 months old and popping it in the freezer. The milk bank collects the milk if you live too far to drop it off once you've got a minimum of 2.5 litres. You have to have plenty of freezer room. You have to make sure it's collected before you've had it three months so this is the second collection I've had.


There are a few things you have to agree to, you can't drink alcohol within 48 hours of donating, which means you can't really drink. That's fine, I'm not a big drinker and over Christmas when I wanted a drink I just had leave off pumping for a few days. You also have to agree to a blood test to check for communicable diseases, obviously that makes perfect sense. You also have to keep a log of your freezer temperatures.

To be honest the hardest part was cleaning and sterilising the breast pump every day, I feel for people who bottle feed, it's an effort!

I received a lovely letter after my last donation from the consultant at the neonatal unit and I thought it was so sweet to hand write to all of the donors.


So it's the end of an era and reminds me how quickly the special newborn time passes. It is a totally worthy cause and really worth doing, so if you want to know more about milk banking in the UK please visit UK association for Milk Banking

The ladies running the milk bank said that some babies take as little as 0.5ml an hour, hence their slogan every drop counts. At the final count I've donated about 8 litres of milk so hopefully there are some babies out there getting as chubby off my milk as my own baby girl :-)

Here is some info from their website on the benefits of breastmilk for premature and sick babies.


Benefits of Breastmilk and Donor Breastmilk


  • Protection from infection. Donor breastmilk is the next best thing to a mother’s own breastmilk if she is unable to feed her baby for whatever reason, or if her baby requires additional milk for a time. Donor breastmilk has benefits over formula because it contains a variety of protective factors which help protect a sick premature baby from infection. These small babies are very prone to catch to infections and they need all the help they can get. These protective factors, such as immunoglobulins, are not present in fomula prepared from cow’s milk.
  • Protection from necrotising enterocolitis. Not only does donor breastmilk protect from infection but it also has a protective role against the syndrome called necrotising enterocolitis.
  • Easier to digest. A preterm baby’s gut is very delicate and it absorbs breastmilk more easily than formula milk because the balance of proteins is different. A sick baby needs to be fed very gently and very small amounts of breastmilk gradually acclimatise the gut to food. This is especially true for babies who have had gut surgery when their gut needs to be introduced to food very gradually.

Monday 2 February 2015

Seville orange marmalade recipe

Here's the recipe for Seville orange marmalade that I've been making for the last few years. Marmalade is one of those things that I have to be in the mood for but it reminds me of happy childhood memories so it's always worth a jar or twenty in the cupboard. Seville oranges are only available for a short period in January so you have to make it when you can and then find somewhere to store all the jars for the year!

It's got so few ingredients that it seems really simple, but it's a lot more effort than making other jams. It's so worth it though and I enjoy the process. Couple that with knowing I've got food stored for just in case makes me feel warm and fuzzy inside.

Anyway I digress, so back to the present...marmalade.


Ingredients:

1 kg Seville oranges
2 kg sugar
1 lemon

The recipe calls for preserving sugar, the reasoning being that the larger crystals make a clearer marmalade. To be honest it's three times the cost of granulated sugar and as it's just sugar I can't justify the costs. If however you're into entering jams for shows or you are just a perfectionist then go for it.

Instructions:

1.  Wash and dry the fruit. Add 1.5 to 2 litres of water to a preserving pan or wide pan. The mixture shouldn't come up further than half the side of the pan.

2.  Juice the oranges and lemons and add the juice to the water. Throw away the lemon skin but keep the orange skins and the pips.


3.  Scrape the pith and pips out of the orange skins. Add them to the centre of a muslin cloth and tie with a piece of string. The pips and pith contain the majority of the pectin so they must be reserved and boiled, extracting the pectin to set the marmalade. Put the muslin bag in the water.

4.  Cut the orange peel into strips and add to the water. This can take a while and it goes quicker if you pile up a few skins and cut them together.


5.  Bring to the boil and simmer uncovered for one and a half to two hours. The less water you add initially the quicker it goes, you do however have to boil it long enough to soften the skins.

6.  After the liquid has reduced by about half remove the muslin bag and squeeze as much liquid out as possible into the pan.

7.  At this point sterilise your clean jars in an oven at about 160°C. Leave in the oven until the marmalade is ready.

8.  Add the sugar to the pan and increase the heat until the mixture is at a rolling boil. Be really careful here as the sugar is extremely hot and it spits! It is ready to pot when it reaches 105°C on a sugar thermometer. If you don't have one of these then add a few drops to a plate that has been in the freezer. After a few seconds push it with your finger, if it wrinkles it's ready. If not give it another few minutes and try again. The recipe I use says this takes about 15 minutes. It really depends on your hob. My gas hob took about that, my electric hob never managed to get the mixture up to temp and my induction hob took about 5 minutes.


Adding sugar, a rolling boil and ready to pot

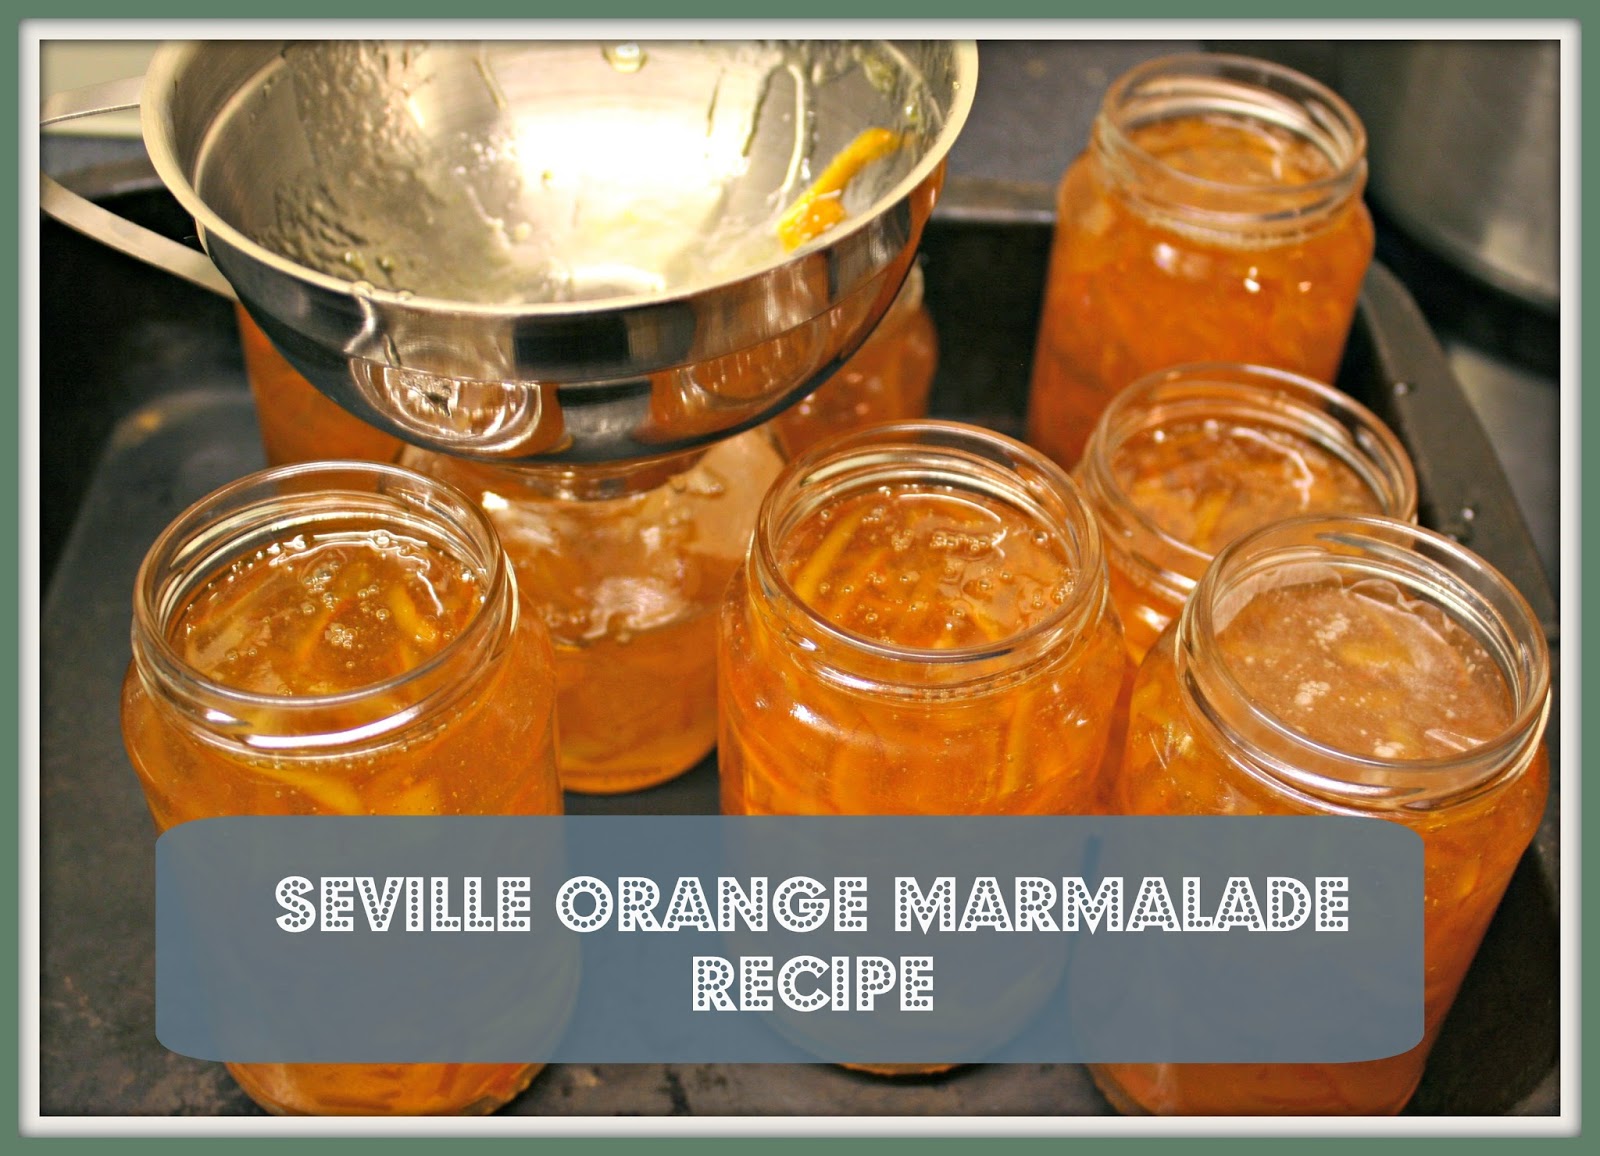
9.  Most recipes say to remove the scum. To be honest I never seem to get any, but if you do then use a slotted spoon to remove it. Take your jars out of the oven. Wait for 5 minutes or so for the bubbles to rise and use a funnel to add to the jars. Don't pot into jars straight out of the oven or the marmalade will boil and be all over the place and this stuff if sticky! Remove any marmalade that gets onto the edges of the jar with a clean cloth.


10.  Put a waxed disk on top. I always put the lid on immediately so that it seals and causes a vacuum whilst the mixture is still hot enough to kill any bacteria but I know lots of recipes recommend leaving to cool before putting the lid on. Do whichever you think is best, I really don't know the reasoning behind leaving it to cool first.


11.  Label with your most beautiful labels and be smug that you made marmalade ;-)

(P.s. I know half the text here is justified and half aligned left, blogger just won't let me justify it all and it bugs me, so sorry if it bugs you too!)